Friday, December 21, 2012

Croque Danielle

Finally I have invented a signature sandwich!

Readers know my love of combining jarlsberg and parmesan, so inspired by a friend's G+post,  I have used them in a sandwich.  Here are the ingredients:

  • a layer of sliced jarlsberg
  • 2 thin slices of ham
  • Fig butter / jam ( I got mine from TJs) spread generously between the ham slices
  • Grated Parmesan
Build those layers between two slices of bread (today I tried sourdough) and cook ala a grilled cheese

It is delicious!  Make your own variations and post about them.


Tuesday, October 23, 2012

Kale Chips -- Kidney Diet

January 2014-  I am adding this to my 'kidney diet' list, and have posted updated oven directions.


The first thing I wanted to try making with my new Nesco American Harvest dehydrator (picked because it was $30 and had good reviews) was kale chips.

For those unfamiliar with the snack, kale chips are made of baked or dried kale which forms a crunchy papery texture.  Traditionally T and I make these by tossing a bunch of kale with olive oil and baking at 300F for ~3min, but we have a 50% burn rate (the progression is: wilted and gross, chips!, burned byond use) so I wanted to try them in the dehydrator. . .

But first a handy kale tip!  
The kale I bought looked very wilted, so I treated it like flowers, cut an inch off the stems and put them in a vase, and poof, perfect kale.  I recommend this as a pre-step for recipes where kale will be eaten raw.

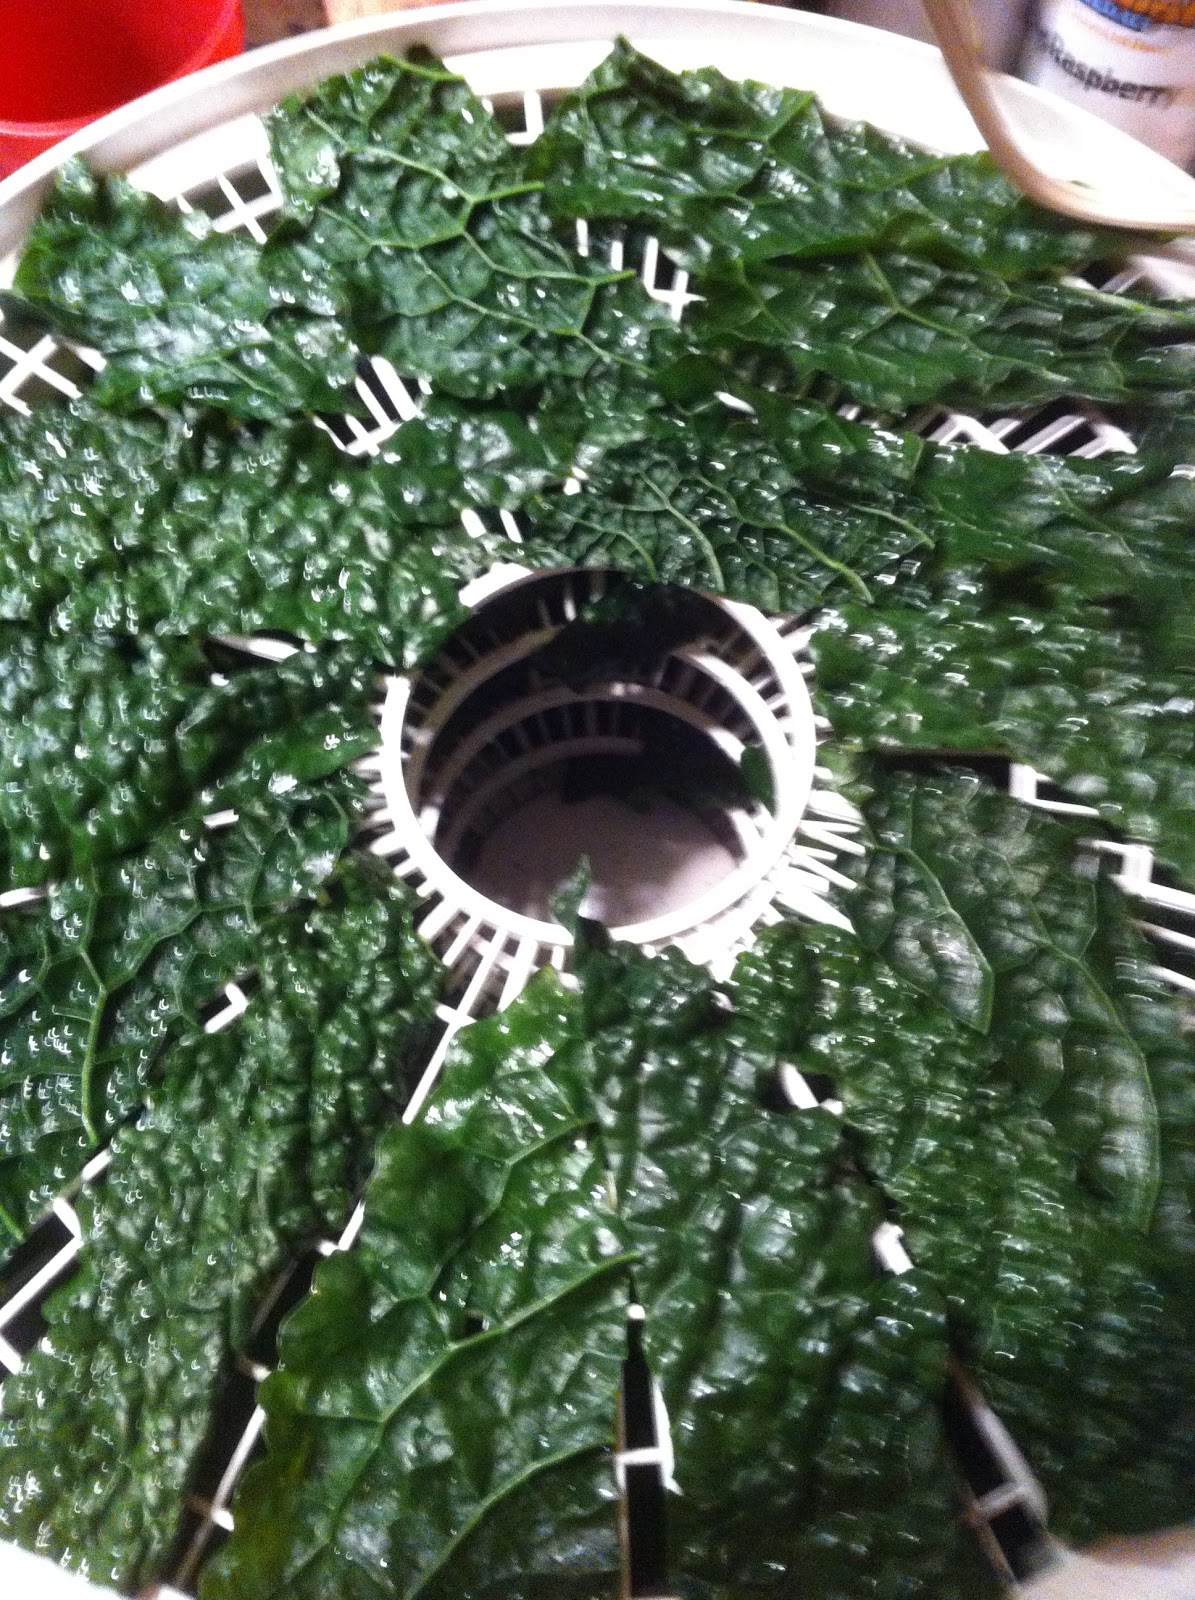
Kale chips work best with "Dino kale" (the kind in the above picture) which has one central vein.
Prepping the kale:
  1. Wash the leaves
  2. Using a sharp knife cut out the large central vein, and then bisect the two leaf halves to quarter the leaf.
For the oven:
  1. Toss 1 bunch with 1tbspn olive oil\
  2. Sprinkle on 1/16th tspn salt
  3. You can make variants by adding black pepper and lemon juice as well
  4. Spread out on racks in a 220F oven and leave for 20min
For the dehydrator:
  1. Optionally blanch the kale (see below)
  2. Lay the pieces out in a single layer on the trays
  3. Check every 30min (your time may vary from my results below) and be sure to taste the kale when you think it is done.  There is a point where the kale looks dry but still has a chewy mouth feel and needs an extra 20min
My first batch of kale chips had a much stronger and bitter taste than the oven variety, so I decided to do a side beside comparison between untreated and blanched kale. To blanch the kale I put the cut pieces in a pot with 1 inch of boiling water and covered it for 2min as a sort of lazy steam.

Here are the two types laid out int he dehydrator:


And here are the finished products: 


The blanched kale has a sweeter and less bitter taste, and a much prettier dark color (not that you can tell from this crazy yellow photo), so I recommend the step.  I think these will be very good sprayed with a little olive oil and sprinkled with salt (our Misto is broken and I don't want to drench them, so I can't do the +olive oil test until I buy a new one).  I feel like the taste over-all is more kale-y and less chip-like than the oven variety which fried a little in its oil coating, but will probably still preferentially make these since it felt less hands on, and there was less burning.


A final note on time:  The unblanched kale took 2 hours and the blanched took 1 hour, so you really save on dehydrator time by blanching, which means it's a good option if you want to crank these out for a party or something.


Thursday, October 4, 2012

Masala Chai


This recipe comes from a friend from my job at U of Pitt, but I have been adjusting the levels to fit my taste.

Ingredients:

  • 40g piece of ginger, sliced
  • 3 tbspns Cardamom pods (crushed open) or seeds
  • 2 tbspns black peppercorns
  • 4 sticks (15g) cinnamon
  • 20 cloves
  • 15 allspice berries
  • 12 star anise
  • 5-8 heaping tbspns loose leaf black tea (the cheap bulk kind you can get at Indian grocers)
Steps:
  1. Place 10c of water and all the spices (but NOT the tea) on to boil and let boil for 30-45min covered
  2. Turn off the heat and let sit covered 5 min
  3. Add the tea and let sit another 3-5 min based on desired strength
  4. Seive into a storage container.
  5. Add desired sweetner (I use 1/2 cup sugar for the ~8cups of tea I end up with)
  6. Store in refrigerator
When desirous of a cup of masala chai mix 1:1 with milk or favorite milk alternative in a mug and microwave until warm.  During cold Pittsburgh winters I would find I could make this on a Sunday afternoon and have chai for all week long.

Tea Strength Notes:
After water loss during boiling, you have 8cups (~72oz) liquid.  At the rule of 1 teaspoon / 6oz, this is 4tbspn.  The 8tbspn, is for added strength, but with some teas this makes the brew too bitter.  In that case I recommend reducing the amount of leaves.  In general, brew a normal cup of tea wth  the tea you intend to use, and use is to evaluate quantity and brew time.

Spiciness Note:
For a spicier chai increase ginger to 60g and use 3tbspn pepper.

IF YOU DECIDE TO MAKE THIS RECIPE PLEASE COMMENT BELOW WITH WHAT FLAVORS YOU FEEL ARE OVER/UNDERREPRESENTED IN THE CHAI.


Easiest Beef Ribs

It's been over a month!
Moving and not having my own kitchen have not been good for this blog, but in another 2 weeks I should be cooking more often.

In the mean time here is a recipe for those of you who like ribs:  Steps 2 and 3 are optional.


  1.  start with ribs.  
    1. I used beef ribs, and I got them at Whoel Foods pre-seasoned.  You could use any kind and if they don't have a rub I would add some salt, pepper, chilli powder, and brown sugar liberally over the top.
  2. Remove the fibrous membrane from the underside.  This can be hard.  Use a knife to cut under it then try and work your fingers beneath in and peel it off. 
  3. Leave the ribs uncovered in your fridge overnight or for 1-2 days to dry age them
  4. Wrap the ribs in foil.
  5. Place the ribs in a 200F over in the morning before work
  6. Come home to perfect ribs 10 hours later
Photographic evidence:

Notice that although the collagen has melted and fat has rendered the meat is a bright pink.  In On Food and Cooking McGee says that retaining a bright pink color is the result of a slow and gradual temperature increase that prevents myoglobin from being denatured, and is the hallmark of successful slow cooking.  This is my first time to achieve it, in contrast to all my attempts at cheap sous vide with a slow cooker.  The take home: Water heats the meat too quickly to achieve the effect.

They tasted very nice with a little BBQ sauce.
I want to now try this approach with brisket.

Tuesday, August 14, 2012

Fig and Carmelized Onion Tarts

Haven't been posting because of no time and no desktop since the move, but wanted I share my first experience using my grandma's Breville Pie Maker.  This is basically a ForemanGrill/ panini press with mini-pie shaped holes.

Typing this on iPhone, so in brief:

Take 4 Large sweet onions and 2tbspns butter.  Slice the Onions and Carmelized them (40 min on simmer with 1 tspn sugar until brown and translucent)

Meanwhile roll out pie dough of choice and cut figs...

Add 2 tspn balsamIc vinegar to finished onions' then divide between 4 pies and top with quartered figs (~1 per pie)

10 min in pie maker or hot oven, the let cool and solidify.
Optionally top with crumbled blue cheese.


Sunday, June 10, 2012

Chicken with Chinese Hot Peppers

Here in Squirrel Hill there is a pretty good Taiwanese restaurant called Rose Tea Cafe, and on their menu is my favorite dish of all time: Chicken with Chinese Hot Pepper

I have always wished I could cook Asian food, which is my favorite continent of cuisine, and I have been eating out too much, but still craving this dish, so i thought I would give it a try.

Ingredients

  • 4 chicken thighs, boned and cut into ~ 1 inch piece, you know, like in Chinese food.
  • ~1-1.5 lbs Chinese green peppers, sliced into thin strips
  • 1 bunch green onion, chopped
  • Sauce (~3tbspn soy sauce, 2 tbspn rice vinegar, 1 tspn corn starch, 2 tspn sugar, dash sesame oil)


These were the peppers I bought from the local Korean grocery.  They had a sign reading "Chinese peppers" but the "hot" was conspicuously lacking.  Not to spoil the ending, but this lack of heat plagued the dish.  So good news if you don't like spicy food:  you can make this recipe and not worry!  Bad news for me, because I was missing the constant runny nose and vague sense of mouth fire that I crave. 
<insert me weeping a single tear>


The longest part of the dish was seeding and pithing the peppers, and then slicing them thin.  It is imperative to set up a sort of mis-en-place(sp?) involving the pre-mixed sauce, chicken, and onion/pepper mix.

Ready?

Heat a pan (or wok, definitely a wok--see below) on high heat and add enough oil to coat the bottom at a temperature where the oil will run freely.  Continue to heat until the oil begins to smoke.

Add the chicken pieces and stir frantically for 3min over high heat, then remove to a serving bowl.

Add a little more oil, then the peppers/onions and stir for ~5 min

Re-add the chicken followed by the sauce and stir for another 1 min, or until the sauce is absorbed and cooked down.

TaDa!

Here is the dish, it was very good although lacking in spice:


Also, here is my poor frying pan (our wk is back in CA):


Any ideas on a better pepper to use?  Maybe if I just include some of the seed I could boost the spiciness?
I have a second package of peppers in the fridge for another try.

Monday, June 4, 2012

Insalata Caprese

Unlike most posts here, which I write so that I can remember how to make food, this post in being written to share my favorite recipe.  I will never forget how to make it because a) it is dead simple and b) I make it 2-3x/month year round.

Insalata caprese is a 3 ingredient, uncooked, dish which means that it is ALL ABOUT ingredient quality.  Flavorless, unripe tomatoes will ruin it, and actual buffalo mozzarella takes it to the next level (for a while our local Costco sold giant tubs of authentic mozzarella buffala for $12.)

Ok, so you have assembled your perfect ingredients which are tomatoes, ovoline mozzarella, and basil leaves.  here is what you do with them:

  • Slice the tomatoes thickly
  • Put salt and pepper directly on the tomatoe (to taste)
  • Slice the ovoline mozzarella more thinly, or in thick slices but cut in half, and place on top.  I usually do 1 ovoline per 2-3 tomatoes
  • drizzle olive oil over this, or, if you have a Misto sprayer you can use that for an even coating
  • top with a basil leaf

Look at that deliciousness!